Tutorial in production, you can follow this blog. I post it at this week:)
Also you can download ready to render scene Donload peperbottle (2009 version)
Sunday, February 28, 2010
Friday, February 26, 2010
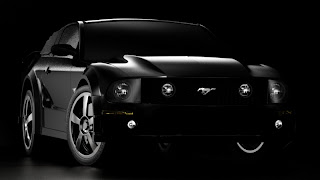
How it's made post #1: Lightning a car in studio.
Today we talk about studio renderings, using V-Ray render, on a car lightning example.
So, first we need a car model:) In my case it's self modeled car. You can use another, it's really not matter because in this tutorial i want to show how create a reflections in the main.
Lets create a studio.
1) Create a box - our photo studio room:) Name it "Back"
2) I maded some chamfer on box.
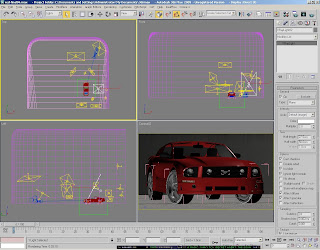
3) Set the camera, like this.
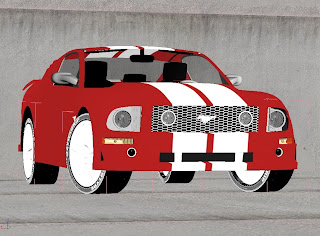
4) Create a VrayMtl, reflection color set to white check fresnel reflections. Don't worry about parameters, is temporarily created material.
5) Create vray light on the top view and place near the wall like this screenshot.
So as you see we dont light the car, walls only, to create reflections as we like.
Ok, lets render first test:) render our camera view:
Looks pretty good:) We maded first reflection on the hood, and top of the car.
6) Lets create another VrayLight:
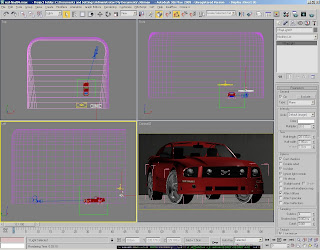
And render:
Wow, now we see one more reflection on the side of the our "horse".
7) Ok, next one we place like this:
And get reflect on front window:
8) Next one for little reflection on front wing:)
Render, see our liiiitle reflection on side of the front wing?:) i like it:)
9) Next one for the back rim, and little bit for side of a car:
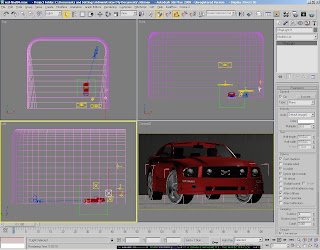
Render:
Render:
This light is created in main for back rim, also for the side of car, ant little bit for front rim.
10) With next light we will light front rim as main:

Render:
Good result:)
11) Ok, as wee see front of the car (our main part) is in shadow:) It's not good, lets fix this, and add one more VrayLight on the front of car:
Render:
What we have here...some reflections on the front:) Let's continue.
*Materials of glass, chrome, plastic its pretty easy to do, i explain this if you want, just write in comments.
12) This one for another side of the front:
Ass you see it's true, now we have another beautiful reflection here:
13) Next one for headlights:
Render and see result:
Wow, headlights(eyes, of the our "horse" portrait) begins to shine!
14) I think we must light logo on the front wire, also we get reflections on plastic and "eyes":
Good:
15)Ok, i think is enough reflections for this render:) Now we light a car, its very important now to light car only, with next VrayLight we make one little trick, in Parameters on this VrayLight press Exclude.. and exclude our scene box, we named before as "Back". And render.
Result:
With brightness of image we work later.
18)Now let's make body car paint material, just do something like on images below:) If you need a more detailed explaining about material, just ask me in comments:) The point of this tutorial is to show how make a studio and reflections. So here's composite material, made from 2 materials:
First is main material, second glossy additive, and here's each material in details:
Second material, with blurry reflections.
* In addition i want to tell you about creating this render. I made so much tests, about 100 test renders, before i get result. I unchecked "Hidden lights" parameter in V-Ray Global switches, placed all the lights into one layer, and hided/unhided each one to render separately, this is very comfortably thing, i like it :) Also very important, before i begin to render this image i watched a lot of photo material with cars.
Final image you can see on the top of the post. If you have some questions, i can try to answer in comments:) Also if you find this tutorial useful, let me know in comments :) Thanks for patience!11) Ok, as wee see front of the car (our main part) is in shadow:) It's not good, lets fix this, and add one more VrayLight on the front of car:
Render:
What we have here...some reflections on the front:) Let's continue.
*Materials of glass, chrome, plastic its pretty easy to do, i explain this if you want, just write in comments.
12) This one for another side of the front:
Ass you see it's true, now we have another beautiful reflection here:
13) Next one for headlights:
Render and see result:
Wow, headlights(eyes, of the our "horse" portrait) begins to shine!
14) I think we must light logo on the front wire, also we get reflections on plastic and "eyes":
Good:
15)Ok, i think is enough reflections for this render:) Now we light a car, its very important now to light car only, with next VrayLight we make one little trick, in Parameters on this VrayLight press Exclude.. and exclude our scene box, we named before as "Back". And render.
Result:
Try to don't exclude our box, and you get bright ground in front of car. I wanna to see black background, without any whiteness:) So this little trick help us to light a car only.
16) Next one for the side of car:

Result:
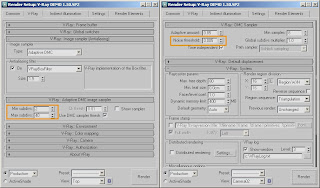
17) Ok, we finished with lightning:) Now we have several problems: first one is very noise reflections, another - very dark image, plastic details looks like black plate.
Ok, let's fix noise, in the render settings window:

With brightness of image we work later.
18)Now let's make body car paint material, just do something like on images below:) If you need a more detailed explaining about material, just ask me in comments:) The point of this tutorial is to show how make a studio and reflections. So here's composite material, made from 2 materials:
First is main material, second glossy additive, and here's each material in details:
Second material, with blurry reflections.
* To put stripes correctly on car, i selected body of car and added planar UVW mapping, i can explain this too, just write in comments.
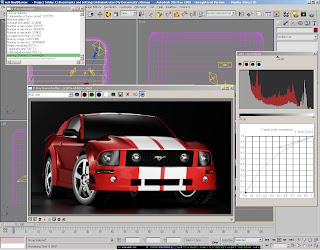
Ok lets render:

Now we can correct brightness of image using Curve in V-Ray built-in Frame buffer.
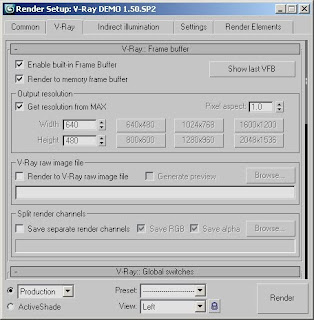
* to enable built-in FrameBuffer:

* In addition i want to tell you about creating this render. I made so much tests, about 100 test renders, before i get result. I unchecked "Hidden lights" parameter in V-Ray Global switches, placed all the lights into one layer, and hided/unhided each one to render separately, this is very comfortably thing, i like it :) Also very important, before i begin to render this image i watched a lot of photo material with cars.
Here you can download a ready to render scene(without car, sorry i can not post it at yet, but in the future i share it), and all of screenshots i showed in 100% quality if you need:) max file is for 2009 version. Enjoy!:)
Download files(11.4 MB)
Subscribe to:
Comments (Atom)


